Walking into your first Muay Thai class can feel scary. Most guides to Muay Thai for beginners skip what actually happens in that first hour.
This guide walks you through a full first class, step by step. It follows a free beginner’s class on YouTube.
Each section has a time stamp, so you can jump straight to that part of the video.
In this post:
Who Is Teaching?
Shane Fazen is the founder and lead instructor of the fightTIPS YouTube channel. He grew up in Philadelphia, Pennsylvania, and has trained in martial arts for most of his life.
His father started him in Taekwondo as a kid, and he earned his black belt as a teenager. At 15, he began training in Muay Thai.
Shane later fought in Thailand, where he won a professional Muay Thai fight by knockout in the fourth round. He then competed in amateur boxing tournaments like the Golden Gloves.
Over time, he chose coaching over fighting. He has helped train Luke Lessei, a Muay Thai fighter in ONE Championship.
FightTips began in 2003 as a martial arts website that Shane built with his older brother. It grew into a YouTube channel that teaches boxing, Muay Thai, kickboxing and self-defense.
In this video, Shane puts his friend Ricardo through a crash course in Muay Thai.
Ricardo is a boxer who has never trained Muay Thai. That makes him a great stand-in for you. You get to watch a real beginner learn each move for the first time.
Muay Thai for Beginners: A Few Words You’ll Hear
- Lead and Rear: If you’re right-handed (Orthodox Stance), your Lead is your left arm and leg. If you’re left-handed (Southpaw Stance), your Lead is your right arm and leg.
- Wai (ไหว้): The Thai greeting. You press your hands together and raise them toward your forehead.
- Punch (Mat /หมัด): In this class, the Jab (Lead Hand) and the Cross (Rear Hand).
- Teep (Teep /ถีบ): The Front Push Kick. Some people call it the Push Kick.
- Round Kick (Teh /เตะ): Also called the Roundhouse Kick. You kick with your shin, not your foot.
- Knee (Khao /เข่า): A strike with the knee, driven forward like a spear.
- Elbow (Sok /ศอก): A strike with the tip of the elbow.
- Thai Clinch (Plam / ปล้ำ): The Thai word Plam literally means “to wrestle” or “to grapple.” In Muay Thai, the clinch is used to control your opponent at close range, deliver knees and elbows, and throw them off balance. In American gyms, you may hear it called the “Plum,” but “Plam” is the standard Thai romanization.
- Balance and structure: Staying steady on your feet after every strike. Shane calls it one of the most important things in Muay Thai.
Step 1: Show Respect With the Wai
Watch it at 0:45
Before anything physical, Shane starts with respect. In Thailand, people greet each other with the Wai (ไหว้).
Press your palms together and bring them up toward your forehead. Men say “sawasdee khrap” (สวัสดีครับ), and women say “sawasdee kha” (สวัสดีค่ะ).
Do the Wai when you walk into the gym. Do it again when a coach or a teammate shows you something.
It’s a simple way to say thank you. It also shows your coach that you’re there to learn.
Step 2: Jump Rope
Watch it at 1:17
In most Muay Thai gyms, class starts with jumping rope. Many gyms use a Thai-style rope, which is thicker and heavier than a normal one.
The heavy rope works your forearms and your calves. Take your shoes off first, because Muay Thai is trained barefoot.
- Start with one round of five minutes. Some gyms do two or three rounds, so work up to that.
- Jump low. Hop just high enough to clear the rope, or you’ll waste energy.
- Find the rhythm. One turn of the rope, one hop. Most beginners do two hops at first, and that’s fine.
- Expect a sting. A heavy rope hurts when it hits your feet. Shane’s advice is to keep a straight face and keep going.
Step 3: Shadowboxing
Watch it at 2:47
Next comes five to 15 minutes of shadowboxing. This is where many beginners struggle because they haven’t learned enough techniques or combinations to know what to practice. They often find themselves standing there, unsure of what to do next.
They want a set routine to follow, like a fight scene in a movie. Shane says real fighting doesn’t work that way.
Picture an opponent in front of you. Move with them, throw when they’re in range, and step away when they come forward.
Work your defense and your angles, not only your offense. Don’t just face one direction the whole round.
Step 4: The Muay Thai Stance
Watch it at 3:49
Ricardo starts in his boxing stance. It’s turned sideways, with his toes pointed in and his weight low.
That works well in boxing, but not in Muay Thai. From that stance, it’s too hard to lift your leg and check a Low Round Kick.
Here’s how Shane fixes it:
- Square your hips. Your hips face your opponent, not off to the side.
- Point your Lead Foot forward. Point it straight ahead, or even turn it a little toward the outside.
- Stand taller. Boxers sit low to slip punches. In Muay Thai, you stand taller, so you can lift your legs fast.
- Keep your feet a bit closer together. A narrower stance makes it easier to check kicks.
- Put more weight on your Rear Foot. Your Lead Leg stays light, ready to check or throw a Teep.
Shane says the stance can change during a fight. You may turn a little more sideways when you’re boxing or moving around the ring.
When the pressure comes on, though, you square up. That way, you can check kicks and keep your opponent away with the Teep.
For another perspective, see how Muay Thai legend Saenchai teaches the Muay Thai stance.
Step 5: The Lead Teep and Rear Teep
Watch it at 6:14
The Teep (Teep /ถีบ) is the Front Push Kick. It keeps your opponent at a distance and knocks them off balance.
How to throw the Lead Teep:
- Lift your Lead Knee up toward your chest.
- Push your foot forward and pop your hips toward your target.
- Hit with the ball of your foot. It gives you a little extra reach.
- Swing your Lead Arm down as you kick, in a scissor motion.
- Pull your leg back to your chest, then set it down in your stance.
Tip: Hitting with the ball of the foot feels like a stab. Hitting with the heel of the foot feels more like a push. Both work.
The Rear Teep works the same way. Shift your weight onto your Lead Foot and aim the kick at your opponent’s stomach.
Combinations from this part of the class:
- Lead Jab, Lead Teep: K-1 legend Buakaw Banchamek has used this simple combination very effectively throughout his career.
- Rear Cross, Rear Teep
Ricardo kept stepping forward on his Jab, which pulled his weight forward. Shane told him to throw the Jab more from the shoulder.
That keeps you in position for the Teep. After every kick, you should be back in your stance and balanced.
Shane also shares a simple rule: if you can’t do it slow, you shouldn’t be doing it fast.
Balance and Structure: The Big Idea
Shane says balance and structure may be the most important things in Muay Thai. Judges reward the fighter who stays steady.
If you throw a kick and your opponent blocks it, but you fall over, the judges notice. If you sweep your opponent to the mat, that scores well for you.
So ask yourself the same question after every strike. Am I balanced, and am I back in my stance?
Step 6: The Rear Round Kick
Watch it at 9:54
The Round Kick (Teh /เตะ) is the kick you’ll throw most in Muay Thai. You’ll throw it at the legs, the body, and the head.
If you practiced Taekwondo or Karate as a kid, you might be familiar with a snapping kick. The Muay Thai Round Kick is different. Shane compares it to swinging a baseball bat, using your whole body to generate power.
The power comes from your hips, and you follow all the way through.
How to throw the Rear Round Kick:
- Take a big step. Step your Lead Foot out at a 45-degree angle. This opens your hips.
- Set your arms. Your Lead Hand reaches down, like you’re reaching for a gun in a holster. Your Rear Hand reaches for your opposite shoulder, guarding your chin.
- Lift your knee and aim with it. Your shin follows wherever your knee points.
- Swing your arms to turn your hips and shoulders, and fire the kick.
- Follow through. Turn a full 180 degrees, as if you’re kicking through your target.
Tip: Turn on the ball of your support foot. By the time the kick lands, your heel should point toward your opponent.
Don’t get discouraged if this kick doesn’t feel natural right away. Shane says he knows people who have practiced it for years without fully getting the hang of it. Keep practicing and give yourself time to improve.
To learn more Muay Thai kicks and how to defend against them, check out THAI FIGHT’s tutorial videos in my post on Muay Thai kicks and their defenses.
Step 7: The Rear Thrust Knee
Watch it at 12:34
The Knee is another staple of Muay Thai. Shane teaches the Rear Thrust Knee (Khao Trong /เข่าตรง) with a marching motion.
How to throw the Rear Thrust Knee:
- March into it. Lift your knee like you’re about to throw a Teep, but don’t kick your leg out.
- Stab the ground with the ball of your Lead Foot. Use that push to drive your Rear Knee up.
- Drive the knee forward, not up. Think of a spear going through your opponent, not a knee going toward the sky.
- Bring your heel to your butt and pop your hips forward.
- Stay on the ball of your support foot, then step back into your stance.
Your hands reach up as if you’re grabbing your opponent’s arms or head. Then you pull them down into the Knee.
Shane shares a cue he learned from Mark DellaGrotte. Touch your head with your fingertips, then touch your hips. It’s an exaggerated motion, but it teaches the swing.
Practice at home with walking knees. Throw a Knee with one leg, step forward, then throw a Knee with the other. Shane says kids in Thailand warm up this way for about 10 minutes.
To learn how to throw and defend against different Muay Thai knees, check out THAI FIGHT’s instructional videos in my post on Muay Thai knees and their defenses.
Step 8: The Horizontal Elbow (Sok Tat /ศอกตัด)
Watch it at 15:18
An Elbow uses the same body mechanics as a Hook or a Cross. You turn your hips and shoulders and step to close the distance.
The difference is that you only have half an arm. So you need to get closer.
- Hit with the tip of the elbow. That’s the part that cuts, not the forearm.
- Point your thumb toward yourself as you throw the Horizontal Elbow (Sok Tat /ศอกตัด).
- Keep your hand open and relaxed. A tight fist flexes your forearm muscles, which pads the bone. An open hand keeps the bone hard, and it saves energy.
Step toward your opponent as you throw the Elbow, keeping your stance, balance, and guard throughout the movement.
Most beginners won’t use Elbows in a match for a while. Many amateur rules don’t allow them. It still helps to learn the mechanics early.
To learn five different Muay Thai elbow strikes and how to defend against them, check out my article on Muay Thai elbows and their defenses.
Step 9: Heavy Bag Combinations
Watch it at 17:38
After shadowboxing, many gyms put you on a heavy bag or with a partner. It depends on how many people and coaches are there.
Here are the combinations Ricardo works on the bag:
Part A:
- Lead Jab: Use your Jab to measure the distance between you and the bag.
- Lead Teep: Push the bag away with your Teep.
- Rear Round Kick: As the bag swings back toward you, meet it with a powerful Rear Round Kick.
Tip: Kick the bag with the lower half of your shin, not your foot. Kicking with your foot can hurt your ankle or the small bones in your foot.
Part B:
- Lead Teep
- Rear Thrust Knee: Step down, stab the ground, and drive the Knee into the bag.
Tip: Drive the Knee straight through the bag, not around it.
Part C:
- Rear Cross
- Rear Horizontal Elbow (Sok Tat /ศอกตัด): Step in as you throw it.
Tip: You need to step in after the Cross. Otherwise, you’re too far away to land the Elbow.
Step 10: Hitting and Holding Thai Pads
Watch it at 21:03
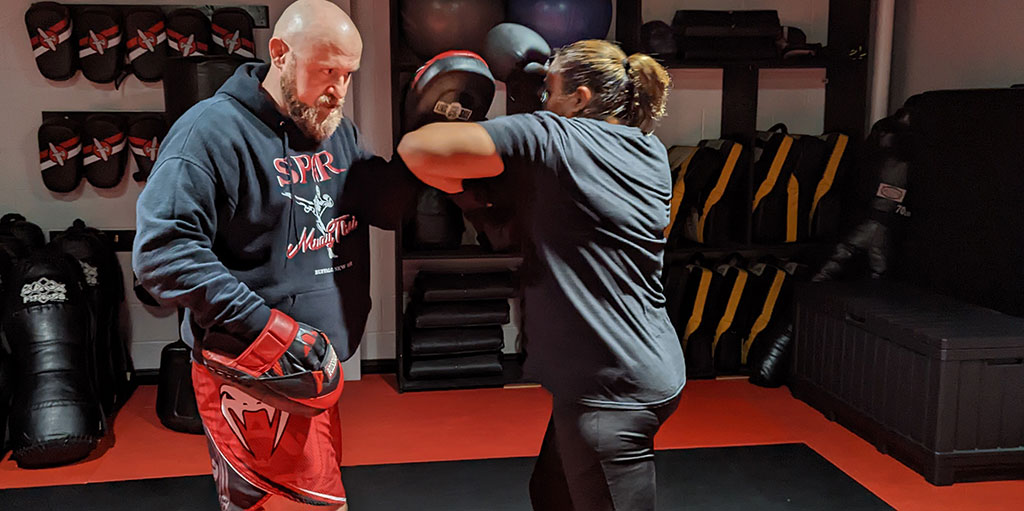
If you’re not on the bag, you’ll likely work with a partner on Thai pads. One person strikes, and the other holds.
Unlike Western Boxing, where pad holders often raise their right hand to catch a left punch, Muay Thai pad holders generally use the same-side pad as the strike.
For example, if you raise your left pad, your partner throws a left punch. If you raise your right pad, your partner throws a right punch.
This same-side method also applies to most Elbow techniques.
Tips for the striker:
- Strike the target your pad holder presents. They raise the pad and call out the strike they want you to throw.
- Aim your Round Kick with your knee. Many beginners kick too high or too low on the Thai pad. Your goal is to strike the middle of the pad. This helps prevent your kick from slipping off the top and hitting your partner in the face, or slipping too low and striking their stomach or groin.
- Drive your partner backward with your Teep. Don’t just tap the pad. Push through the target, not just into it, to generate power and move your partner back.
Tips for the pad holder:
- Meet each punch with a small slap. Shane calls it “a high five with knuckles.” Stiffen your arms as your partner strikes, so you don’t give them “Cactus Arms,” where your pad holding is weak and flimsy. At the same time, don’t reach out so far that you jam your partner’s punch.
- Hold the pads close to your body for kicks. Put the corners together in an A shape. Don’t reach out and bend over.
- Keep your thumbs on the outside. Don’t grip the pad with your thumbs underneath.
- Hold the Elbow targets close to your face to give your partner a realistic target, but leave enough space to protect yourself. You don’t want an accidental Elbow to land on your face and break your nose.
- Talk to each other. Call the strikes clearly, and protect yourself.
Step 11: The Clinch
Watch it at 24:04
Many gyms wait until your first month or so before they teach the clinch. Shane covers the basics so you understand what’s going on.
The neutral clinch (also called the 50-50):
- One hand on the back of the head. Put your forearm across your partner’s collarbone and neck. Grab high, near the crown of the head, so it’s harder for them to resist.
- One hand on the inside of the arm. Shane likes grabbing the inside of the biceps, so he can pull down.
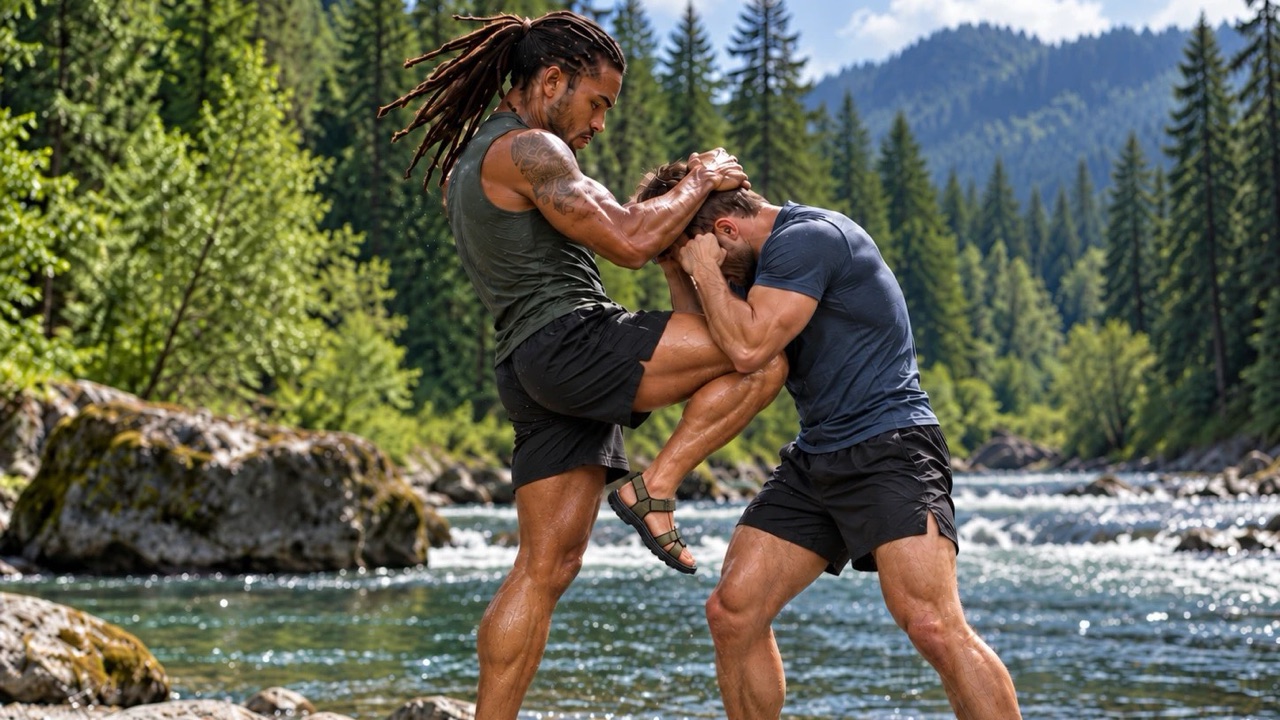
From the neutral clinch, you can swim your other hand inside. With both hands on the back of the head, you’re in the Thai Clinch (Plam / ปล้ำ).
To see how the Thai Clinch can end a fight, read how Johnny Walker finished Mick Parkin with a Thai Clinch Knee.
Stay hip to hip. Beginners like to leave space between their hips, but that space lets your partner land Knees. Stay close and block their Knees with your hip.
Keep your head up and stand tall in the Clinch! Don’t bend forward or lower your head. This puts you in a dangerous position where your opponent can land a Knee directly to your face.
Two Ways to Escape the Thai Clinch (Plam / ปล้ำ)
Shane demonstrates two techniques for escaping the Thai Clinch.
Technique 1: Crossface
Use your forearm to push against your partner’s jaw, turning their head away to create space and break their control of your neck.
Technique 2: Swimming
Slide your arm inside your partner’s arm and reach up to grab the back of their head. This helps you regain inside control and put your partner in the Clinch.
When both partners keep swimming for inside control, they constantly trade positions. Shane compares this back-and-forth battle to a game of chess.
Training Tip: When practicing Knees with a partner, make contact with the soft part of your thigh, not your kneecap. This allows you to practice the technique without injuring your partner.
Step 12: Stretch Before You Leave
Watch it at 28:39
Shane ends class with stretching, and he says breathing matters most. Take five slow breaths in each stretch, about four seconds in and four seconds out.
- Butterfly stretch: Sit with the bottoms of your feet together. Pull your heels in and press your knees toward the floor.
- Hamstring stretch: Sit with your legs straight. Bring your chest toward your shins, keeping your back straight at first.
- Low lunge: Step one leg forward and slide the other back. Shift forward until you feel the stretch in your hip.
- Calf stretch: Stand with one leg back, knee straight, and press that heel into the mat.
Jump rope, Knees and Round Kicks work your calves and hips hard. Even if your class doesn’t stretch, Shane says to stretch right after class or at home.
Learn More With Shane Fazen
If you want to take your training further, check out MAGNVS, Shane Fazen’s online training platform. It offers structured instructional courses taught by Shane and other experienced coaches.
How to Start Muay Thai in Portland
Here’s how to get started, step by step.
- Watch the video. Pick one step, like the stance or the Teep, and watch it a few times.
- Practice slowly at home. Jump rope, shadowbox, and do walking knees. Stay balanced after every strike.
- Train with a coach. A video shows you the moves, but it can’t tell you what you’re doing wrong.
- If you’re in the Portland, Oregon area, reach out to me when you’re ready. Use the contact form on TrainWithSean.com.
Want to Learn Muay Thai? Stop Watching and Start Training.
You can watch hundreds of Muay Thai videos on YouTube and study every punch, kick, knee, elbow, and clinch technique. But there’s one thing those videos can’t do.
They can’t tell you what you’re doing wrong.
That’s where a good coach makes all the difference.
I’ve been a Certified Muay Thai Instructor since 1997, and I’ve spent decades helping people learn how to strike with power, move with balance, and defend themselves with confidence.
Here’s what makes private lessons different:
- No crowded classes. You get my full attention for the entire lesson.
- No guessing. I’ll show you exactly what to do, correct your mistakes, and explain why each technique works.
- No pressure to keep up. Whether you’re a complete beginner or returning to martial arts after years away, we train at your pace.
- No wasted training time. Every lesson focuses on helping you improve.
Never trained before? That’s fine. Your first lesson starts with the same basics you read about here: your stance, your balance, and simple strikes like the Jab and the Teep.
You don’t need to be in shape. You don’t need any experience. You just need to show up ready to learn.
If you live in the Portland, Oregon area and you’re serious about learning Muay Thai, I’d like to help you get started.
Learn More About Private Muay Thai Lessons in Portland, Oregon
Coach Sean Haley
Certified Muay Thai Instructor Since 1997
TrainWithSean.com